This super stardestroyer model lied in my to-do boxes since 15 years. Every modeler does that : buying more and more models, great deals, we will make them very soon, for dure. As soon as we get the time to, I start tomorrow max. If not tomorow, this week-end, no problem.
The life cycle of a modeler is like :
- birth
- first model given for the 10th birthday
- first model assembled (no paintjob)
- second model bought
- assembly of the second model with paintjob (would have been better without)
- 247 next models bought
- assembly of the 3rd model (good job)
- beginning of the 4th model assembly
- death
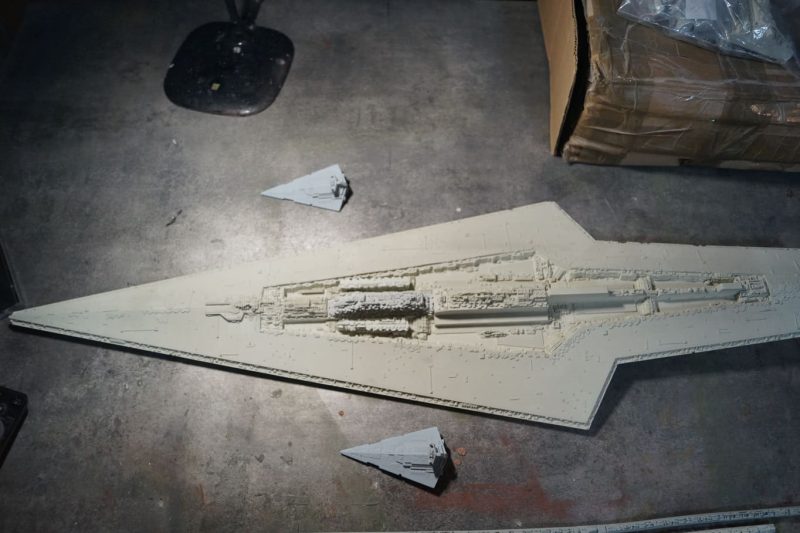
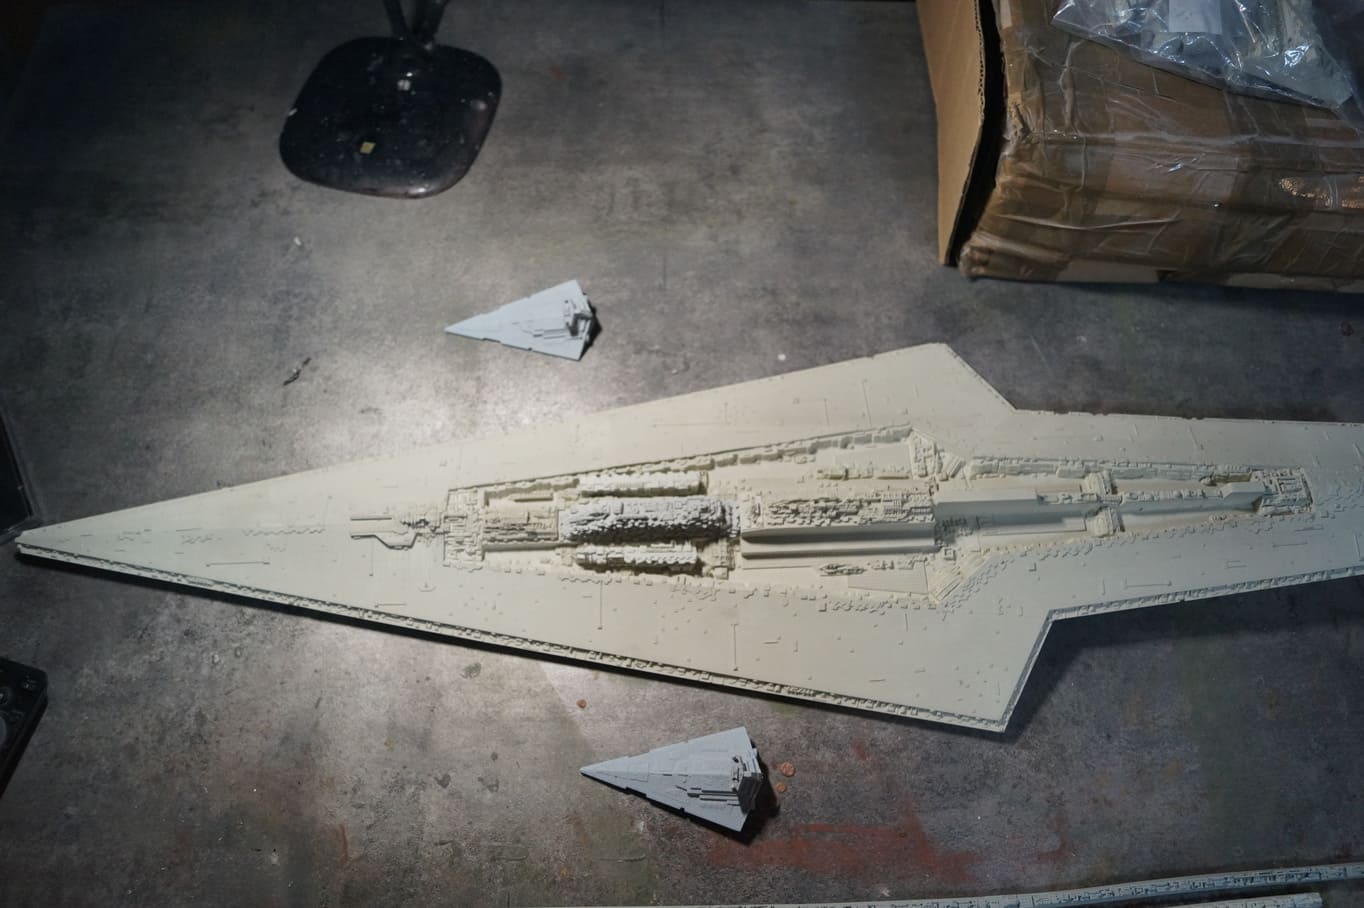
For once, I ended a model. Let’s go for the assembly revue of the super stardestroyer Executor.
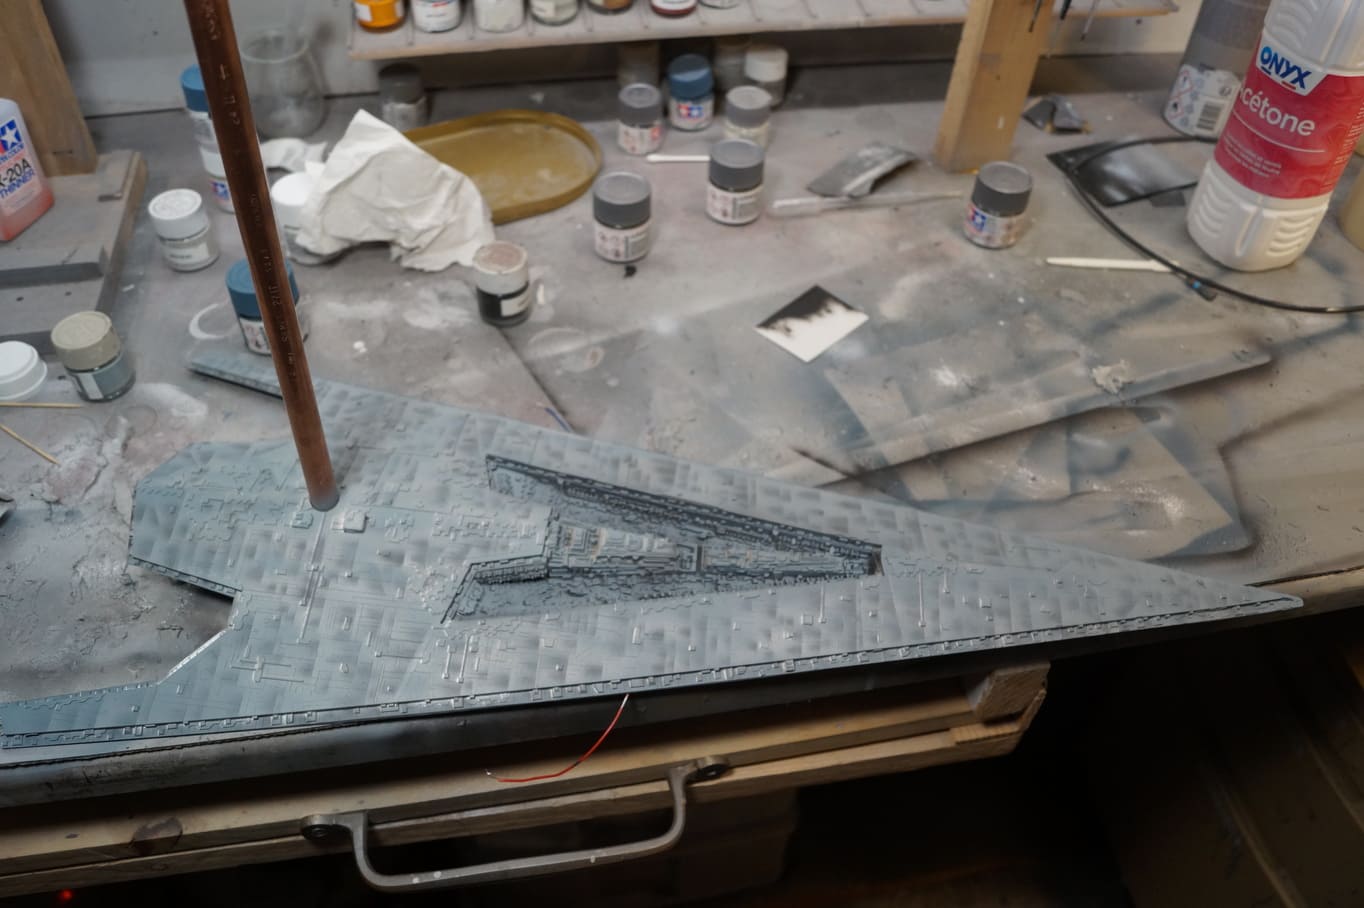
First, the assembly
You must know this is a “garage-kit”. Long before the rise of the empire 3D printers, non-professional modelers tinkered their models from various parts and molded them in their garage. That’s the origin of “garage kits”. That was in 2010, I was there Gandalf, you couldn’t imagine.
So, does this Korbanth Executor worth something ? There are pros and cons.
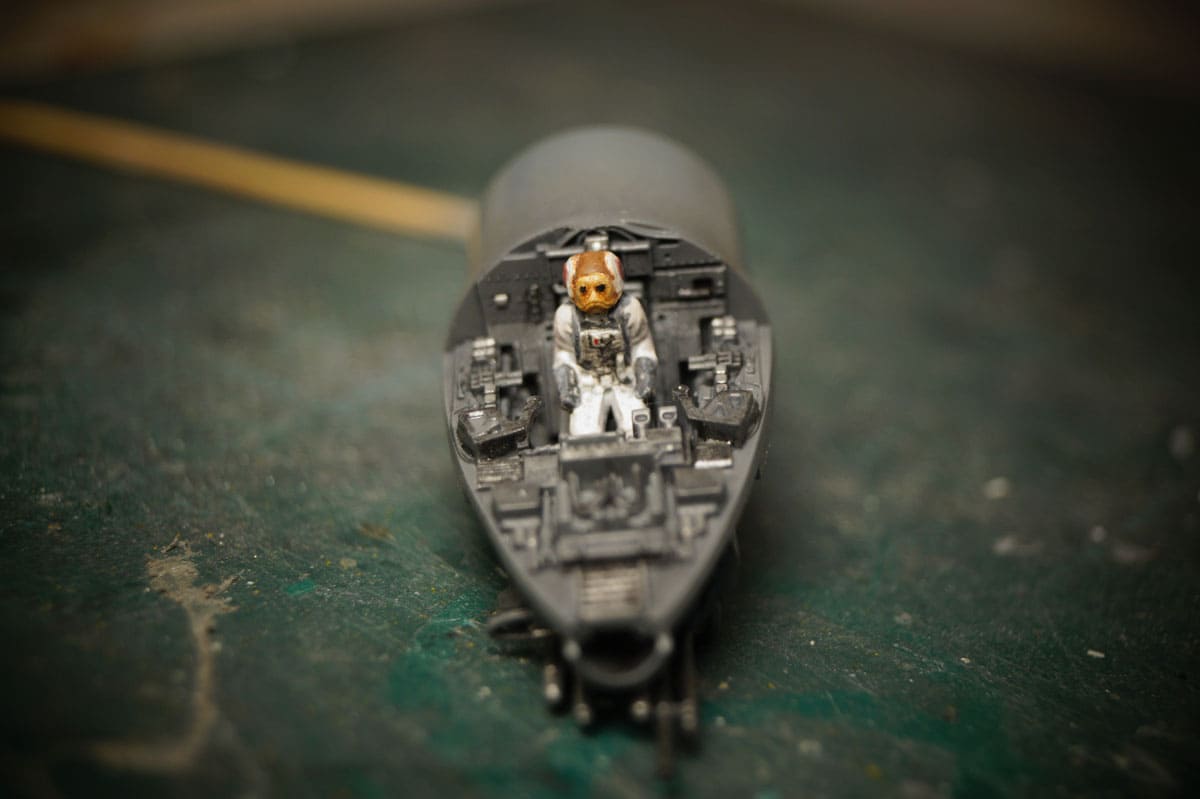
Parts are accurate but I’ll add some details, of course. Many parts can be easily odentified : jerricans, boat parts… Just as the fiming model by the way. proportions are good and it’s the only thing I need because it usually can’t be fixed if not.
One disappointment : the sides of the vessel, just a recast of the Revell Venator.
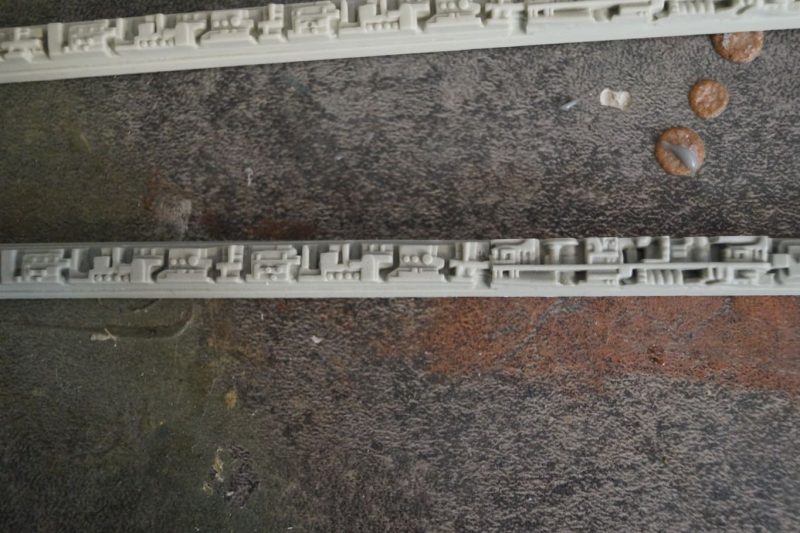
Iknow the model well, I already bouilt two of them and I can’t use those things just like that. I’ll have to remake.
By the way, I lied in the title, I can’t assemble just know. First : the lightup.
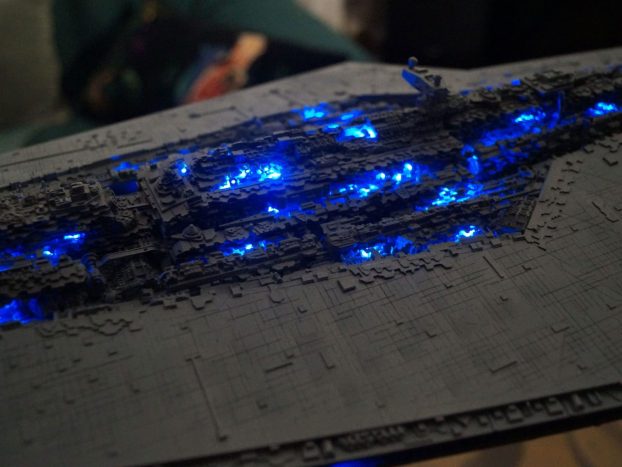
Super stardestroyer Executor lightup
Three options :
- optical fiber, as usual
- burry some LEDs in the superstructure to get indirect lightup
- scroll in Instagram for hours like everyone and do nothing
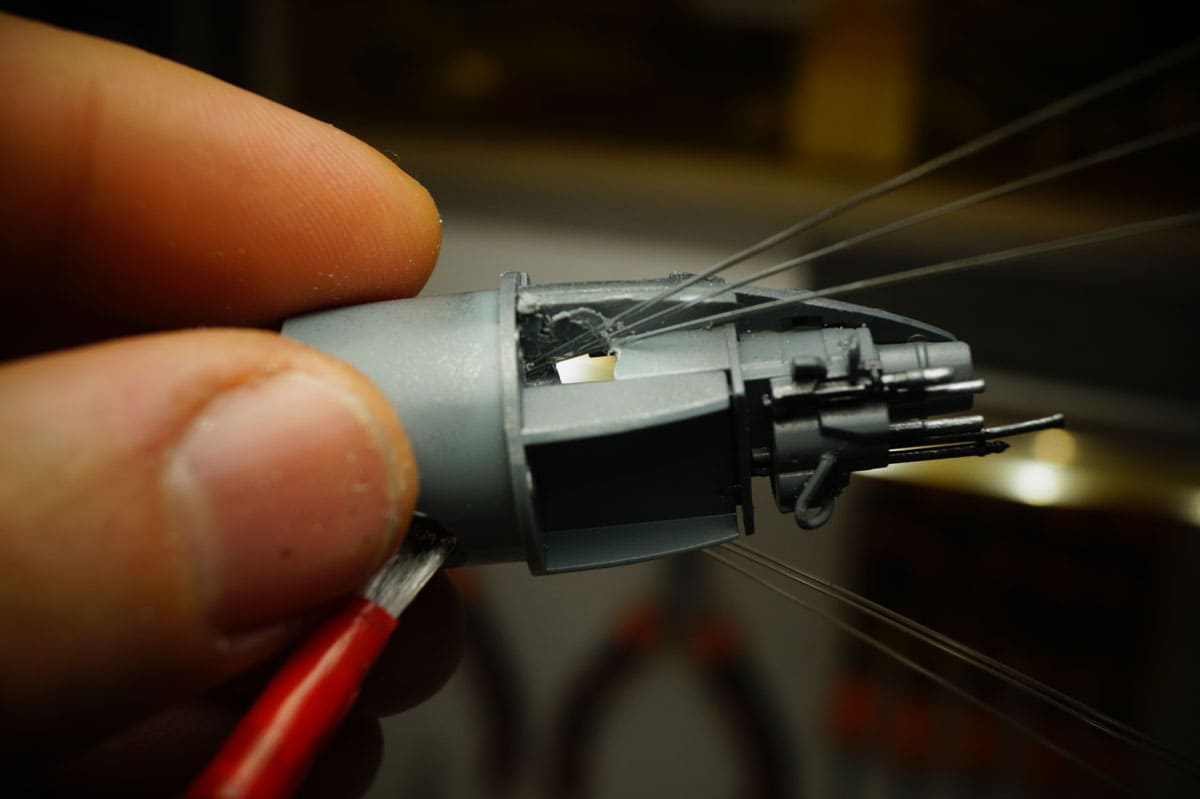
I hesitate for a long time (14 years in fact) but optical fiber didn’t come to be the write choice for many reasons. First is technical, the resin parts are filled, I would have to hollow them to pass the fibers. The resin dust is carcinogenic, I would have died long before the end of the assembly. Teh second is matematical: with this 1:20 000 scale, a 0.3mm optical fiber (smallest ones) figure 6m in diameter portholes and I would need thousands to stay realistic.
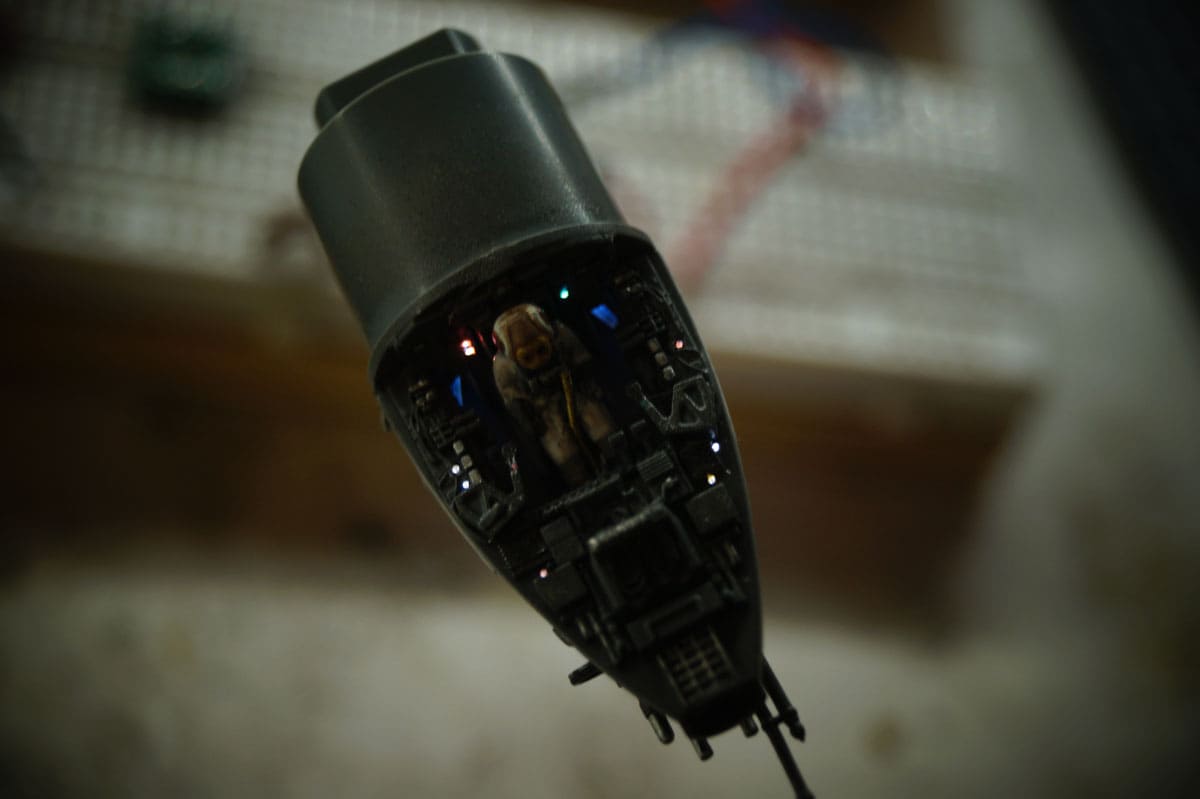
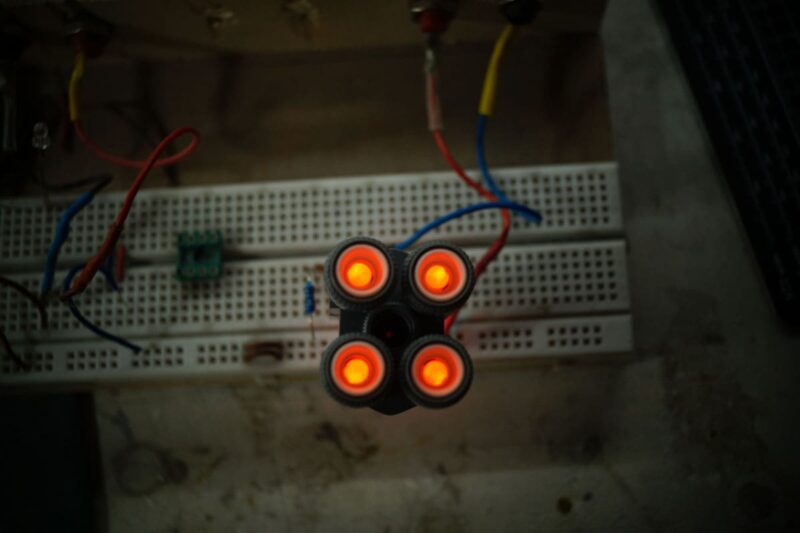
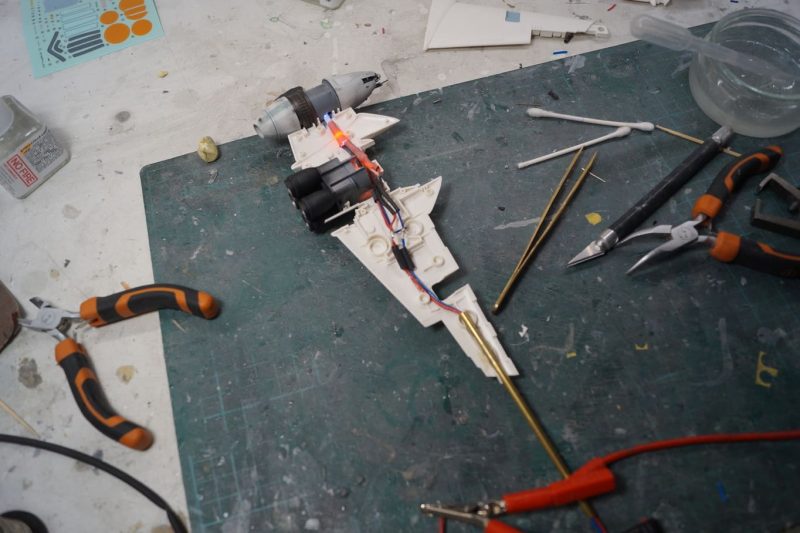
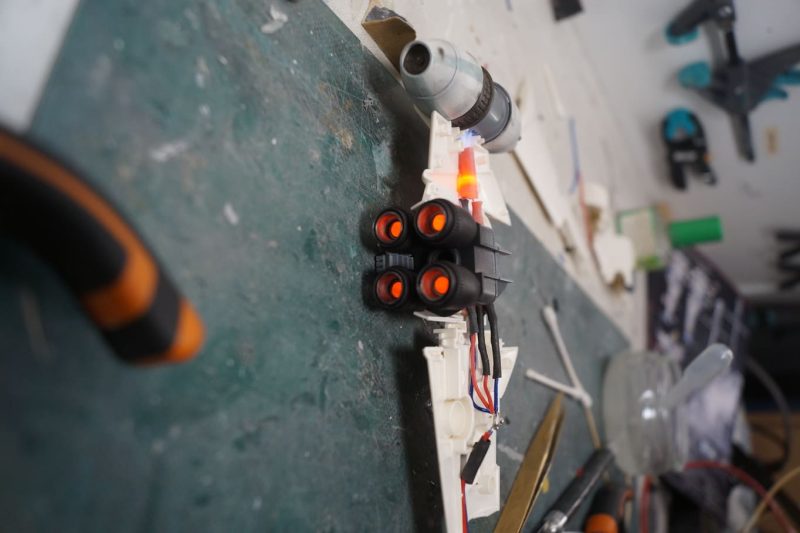
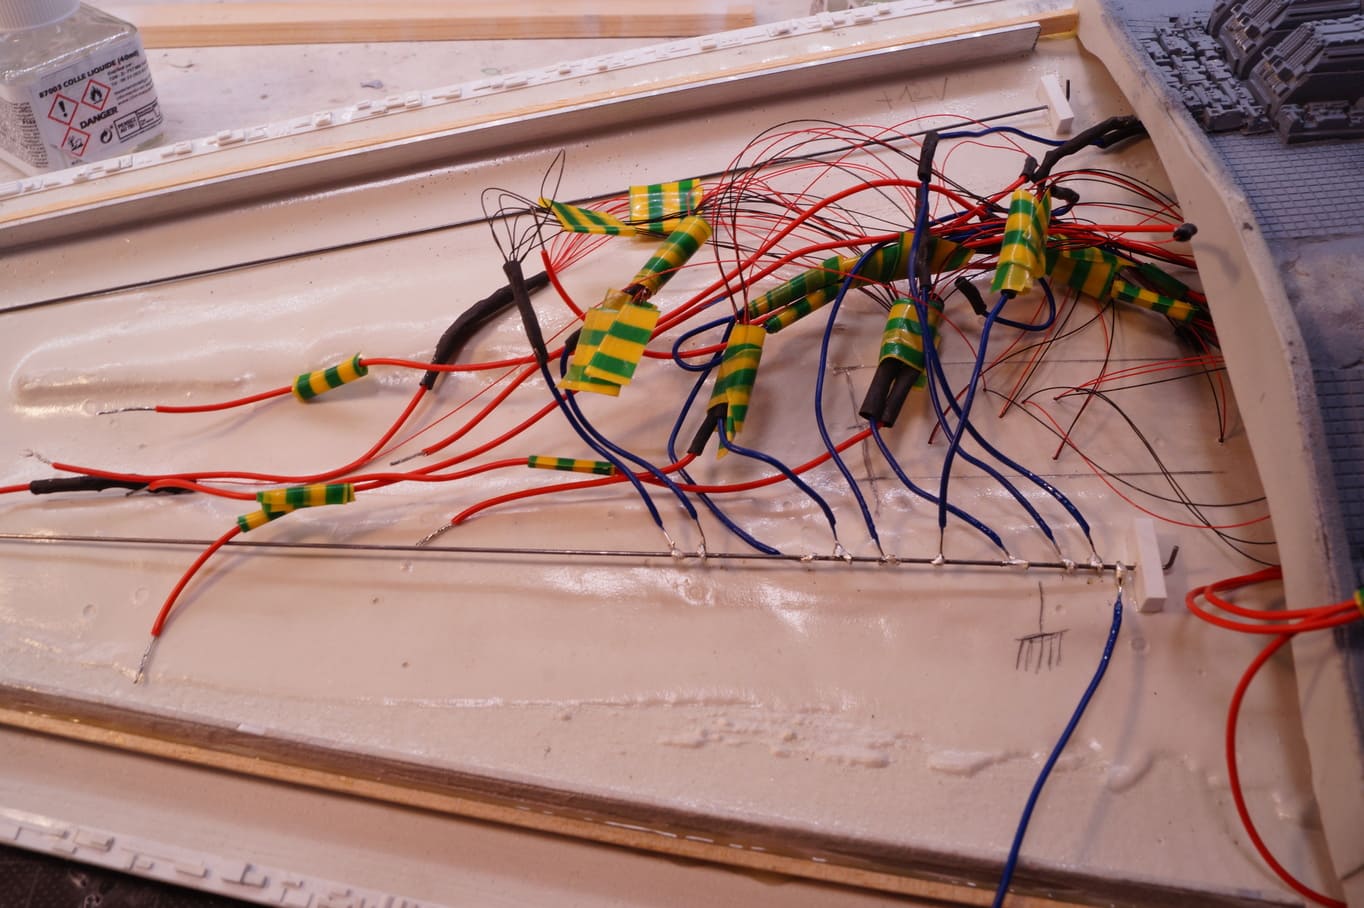
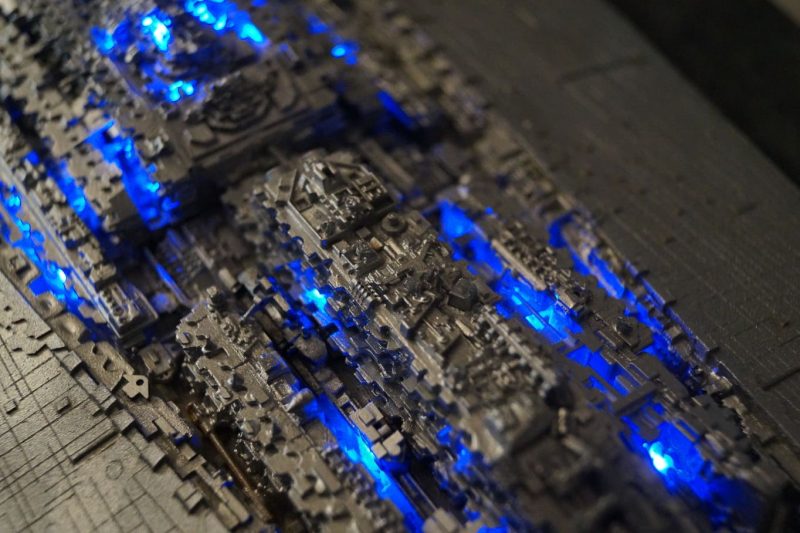
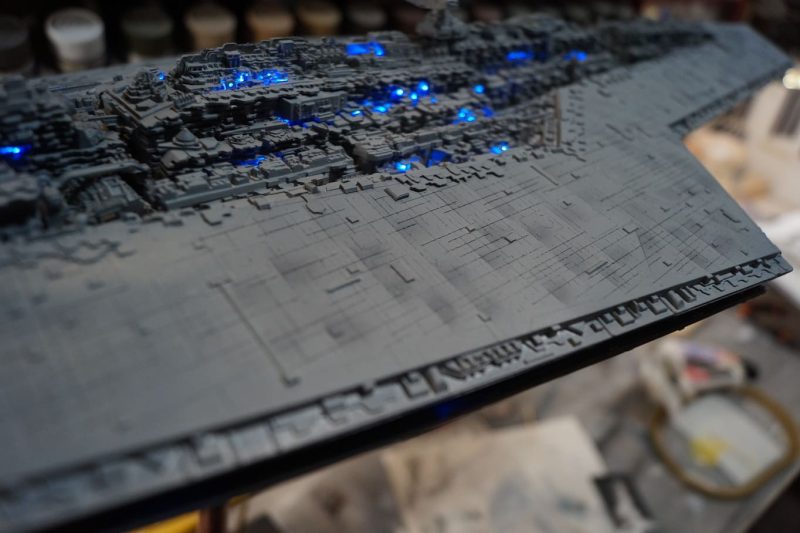
That’s the reason I burried many CMS LEDs into the structure to get this indirect lightup wich simulates the glow of thousands of portholes. Here is the method:
1-Positionning some LEDs on evrey module
Using the Dremel, small holes are digged. Small LEds CMS are fitted in.
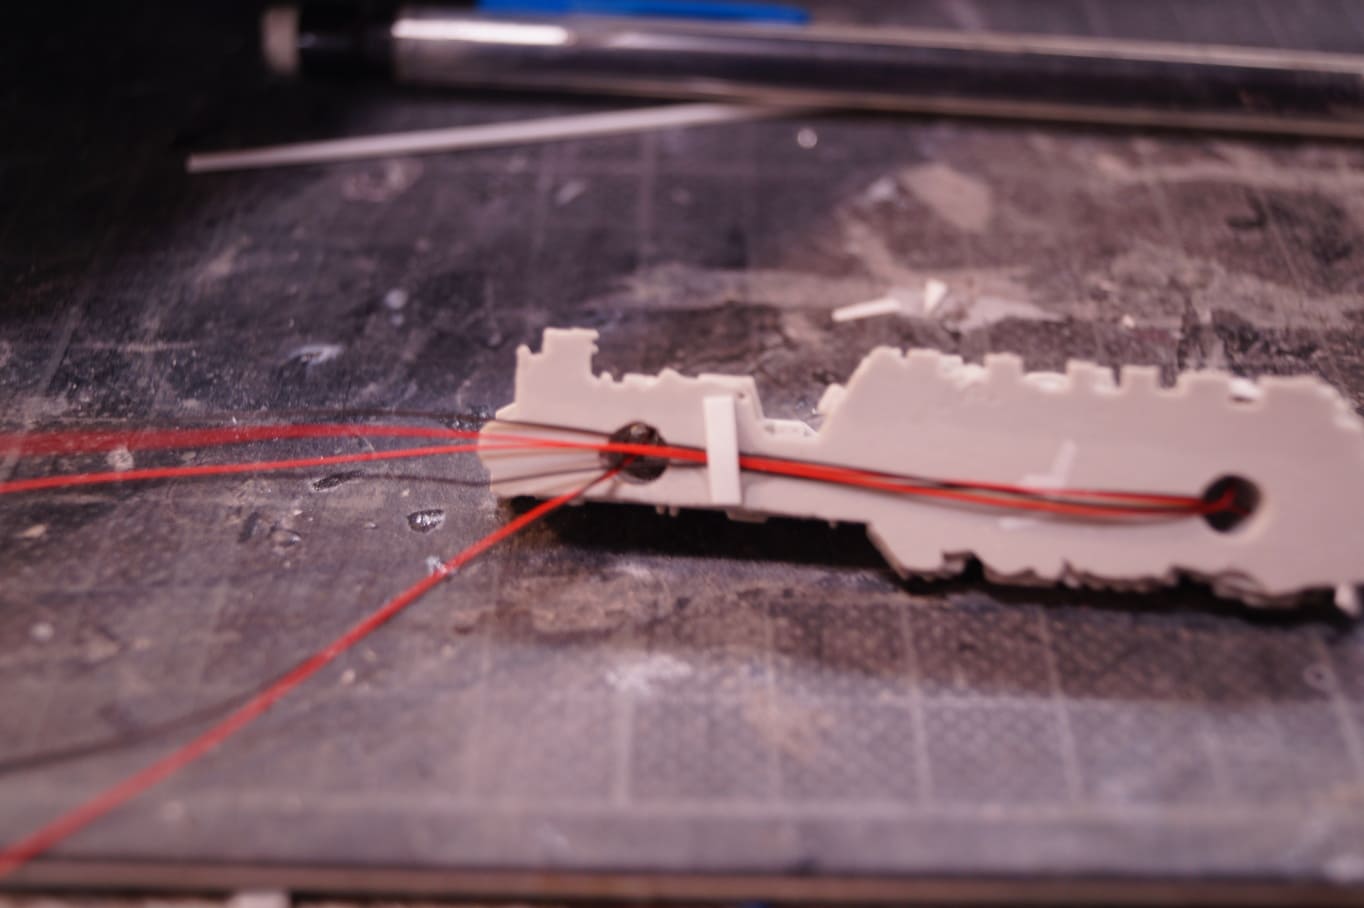
2 – Frilling the hull
Wires are fed through the holes and then recovered them into the ship’s body.
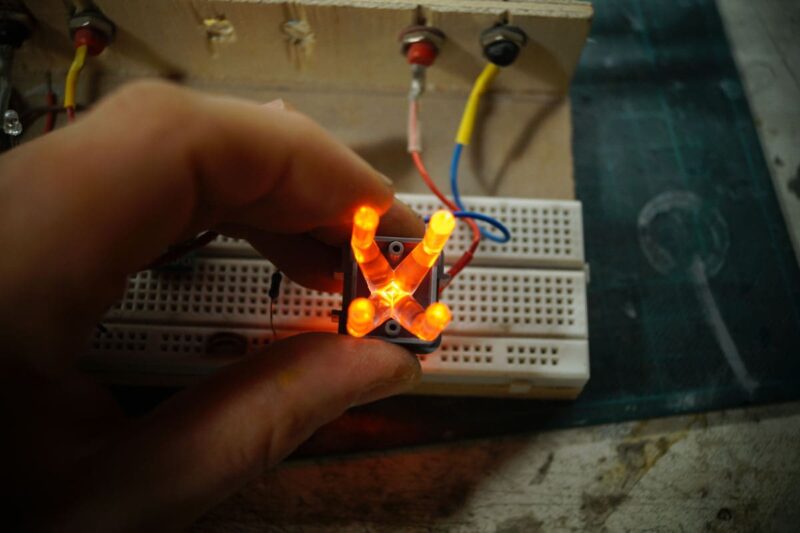
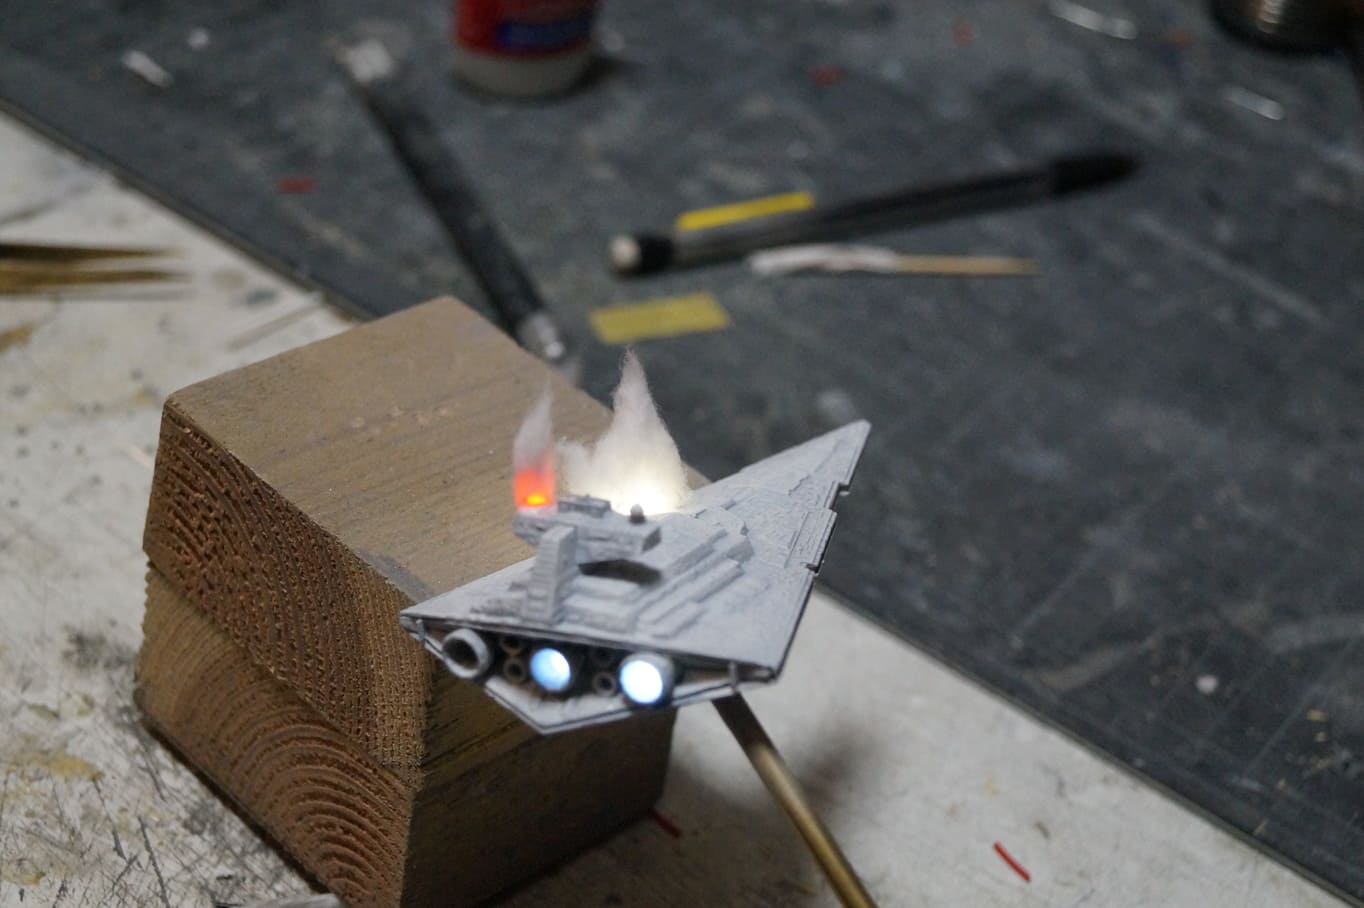
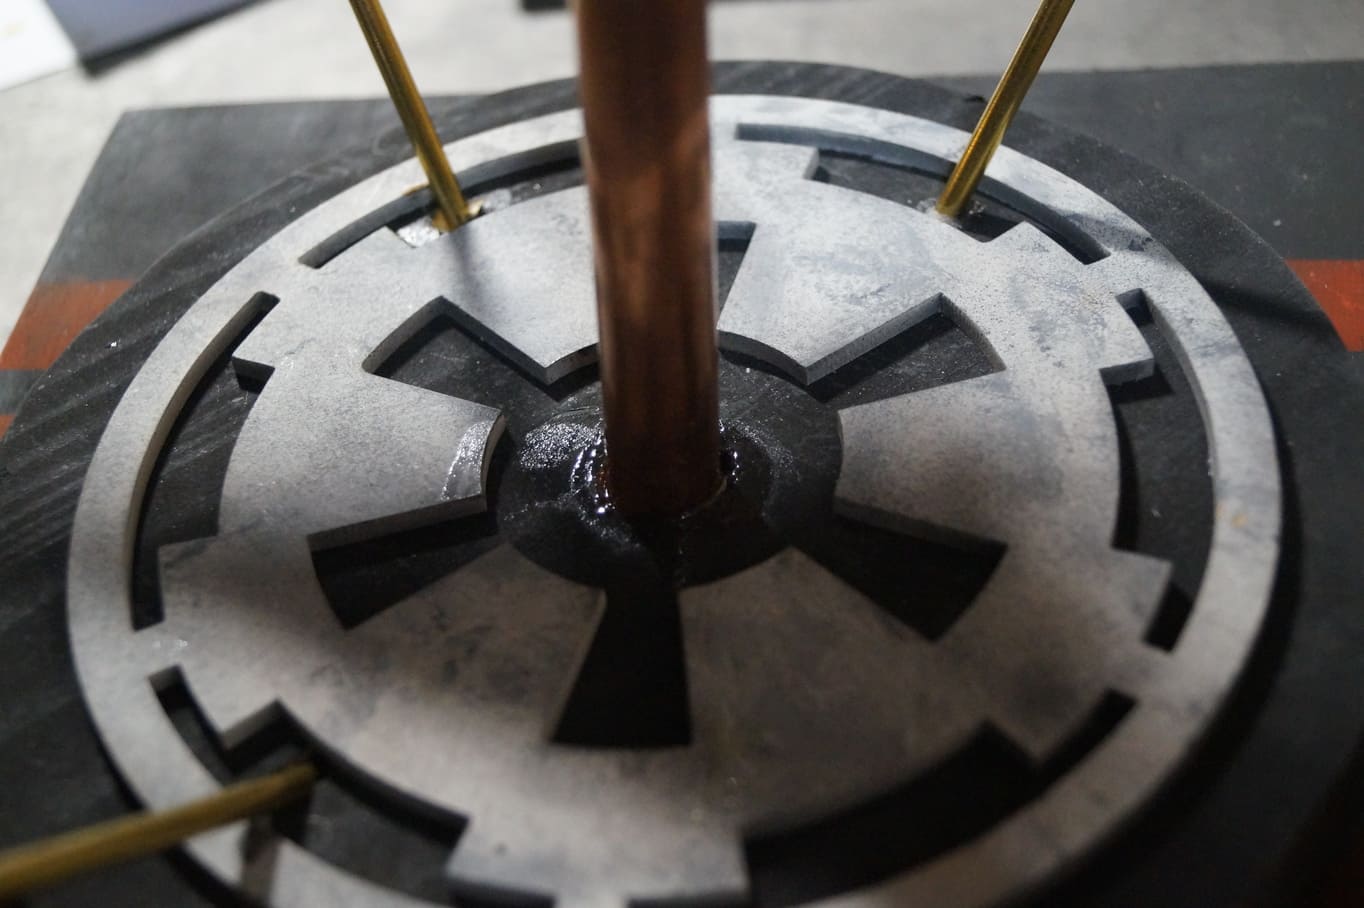
3 – Welding the wires
I put two steel rods along the edges od the vessel, one for the “plus” and the second for the ?
(…)
Minus ! Nobody’s listenning ! Yet that was easy!
The satisfying result:
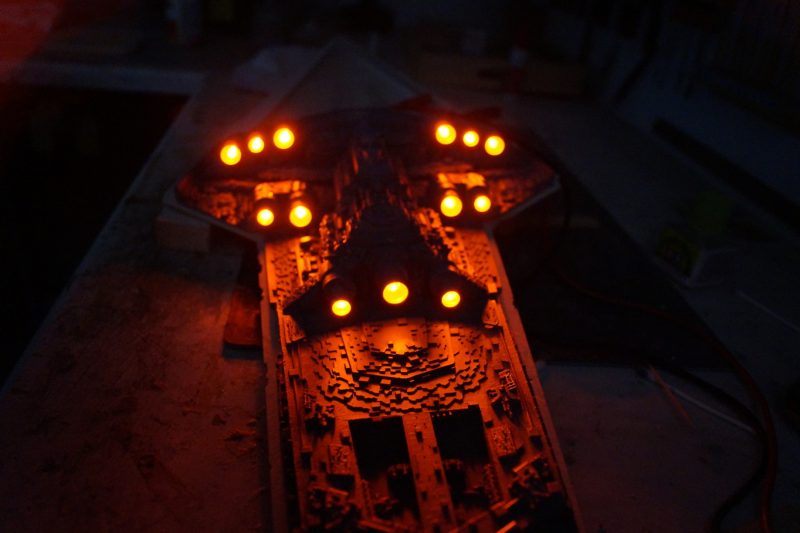
The thrusters lightup is not very difficult, I did that thousands of time. Well maybe not thousands but hundreds.
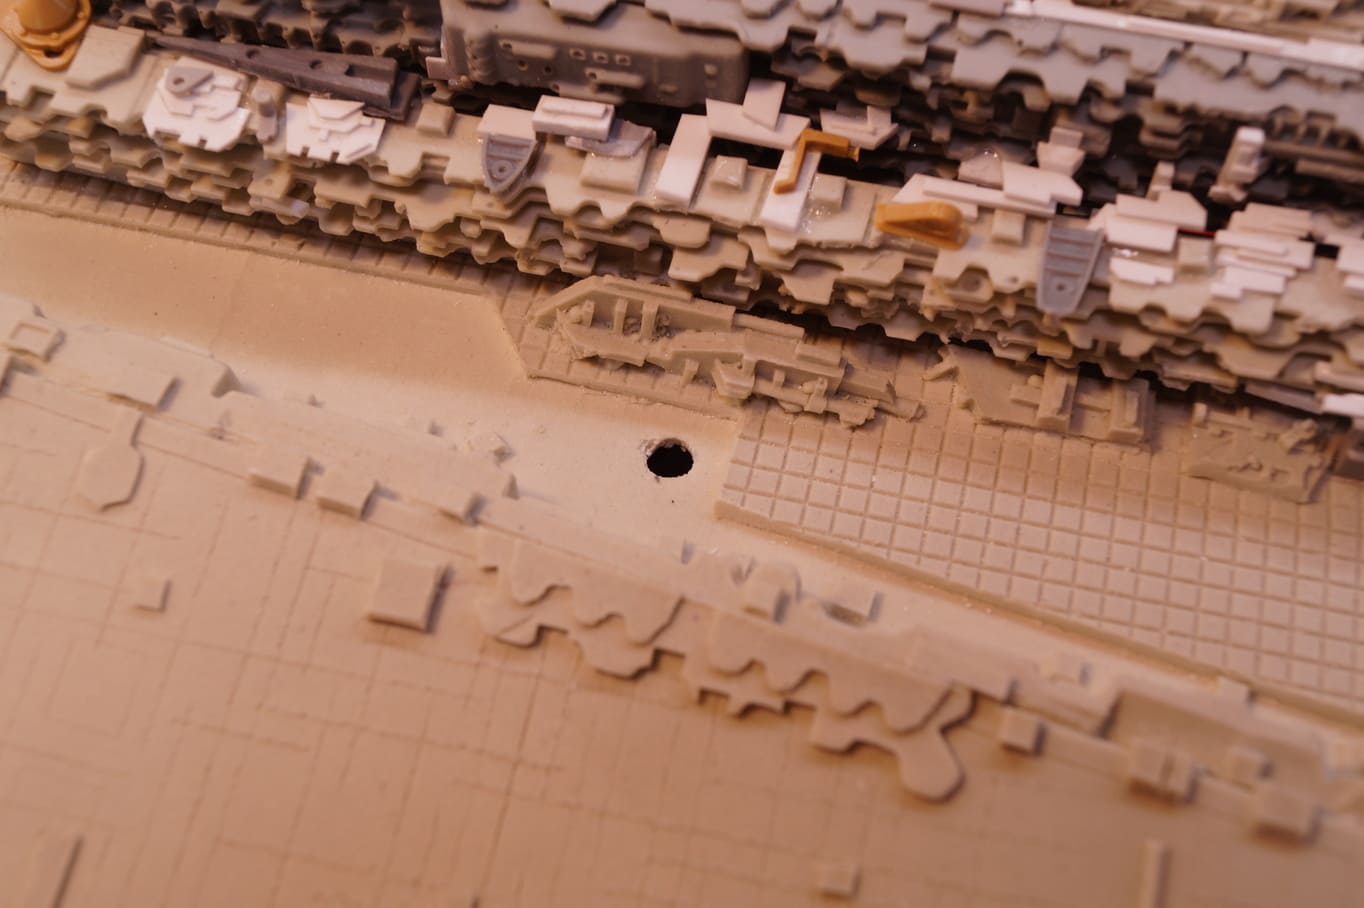
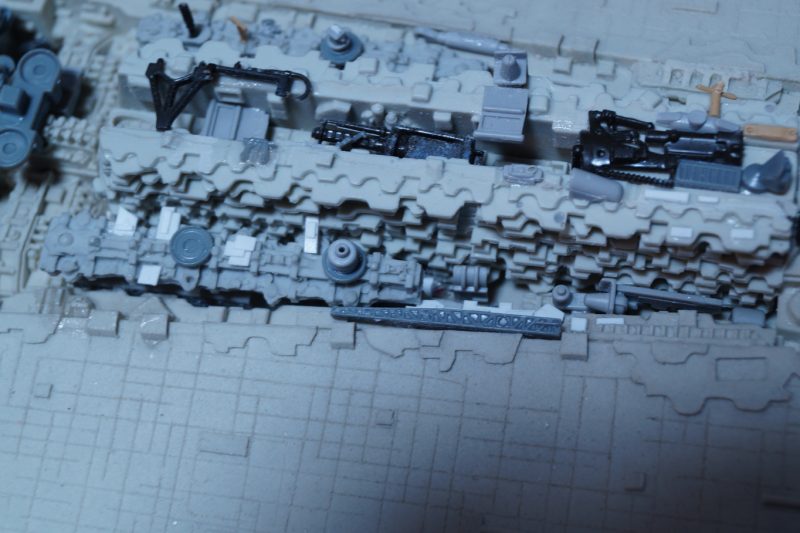
Détailling
As noted above:
Some details are being added
Petersteven
And yes, I’m quotting myself, if you want the job done, you’d better do it yourself. The kit’s modules are a little… “linear”. Compared to the filming model, we find the linear structure but the modules are much messier.
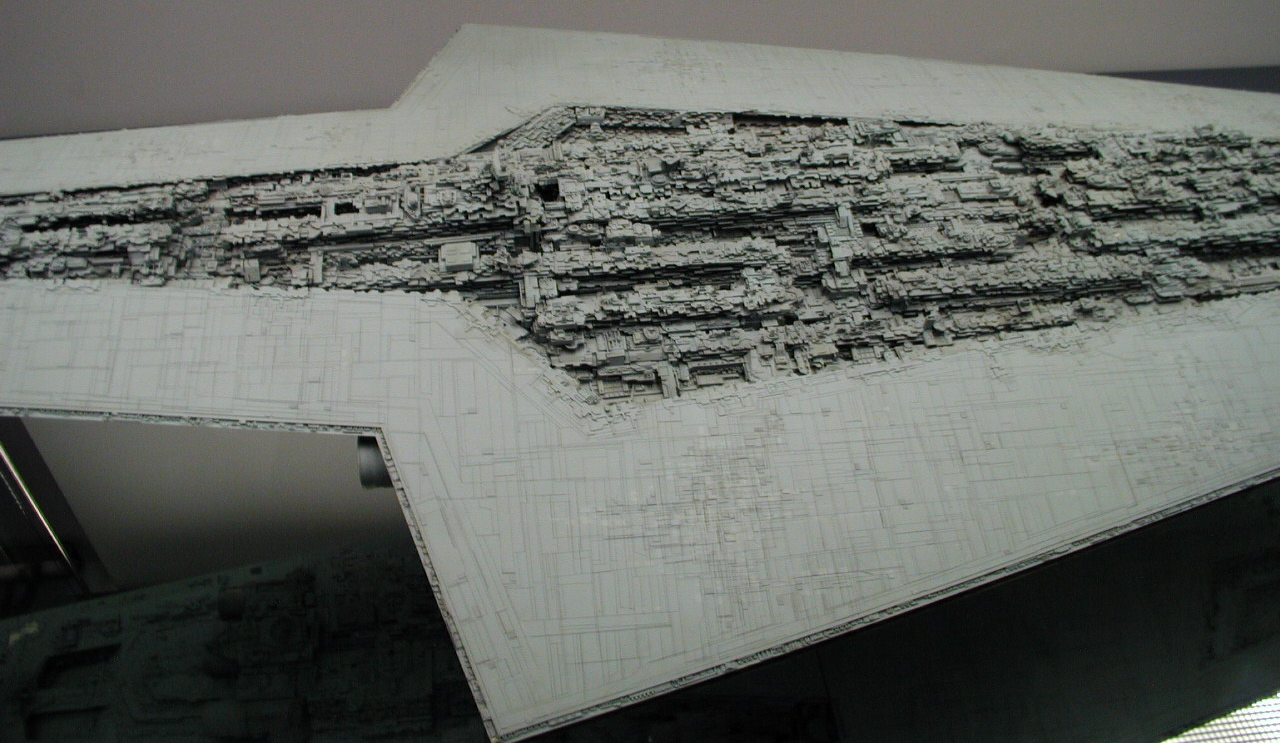
The job is simple: add many many (many) tiny details everwhere. Small model parts, 3D printed garbage, plastic card small parts gathered here and there. Easy: at this scale, realism isn’t a really challenge.
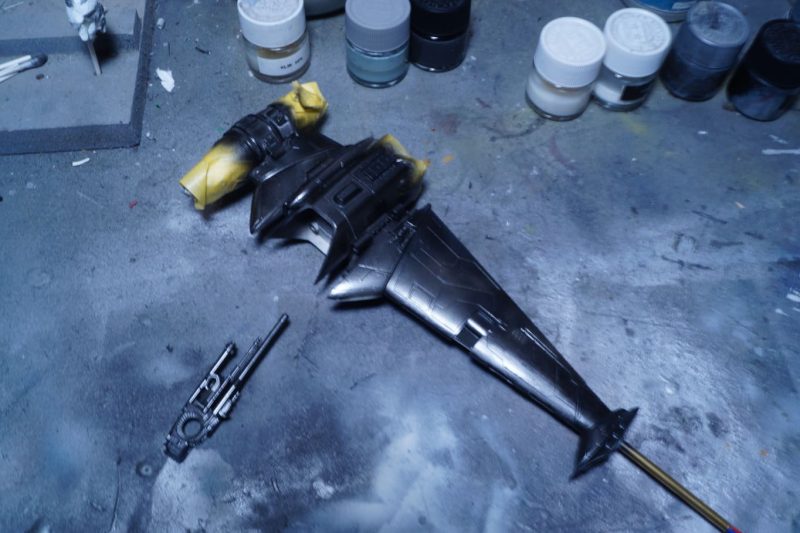
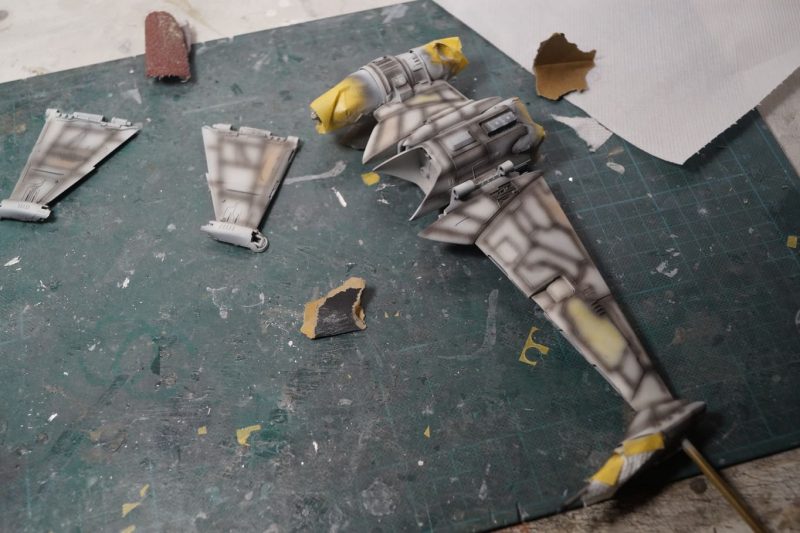
Paintjob on the super stardestroyer Executor
Othing difficult here. The fliming model seems to have been dipped into the can of grey paint. The rendering has to be very plain. Not entirely otherwise it would be boring but still…
Only three steps:
- silver-chrome underlayer as usual
- dark grey pre-shadding: many small forward-facing marks.
- tint melting with the main grey-blue color.
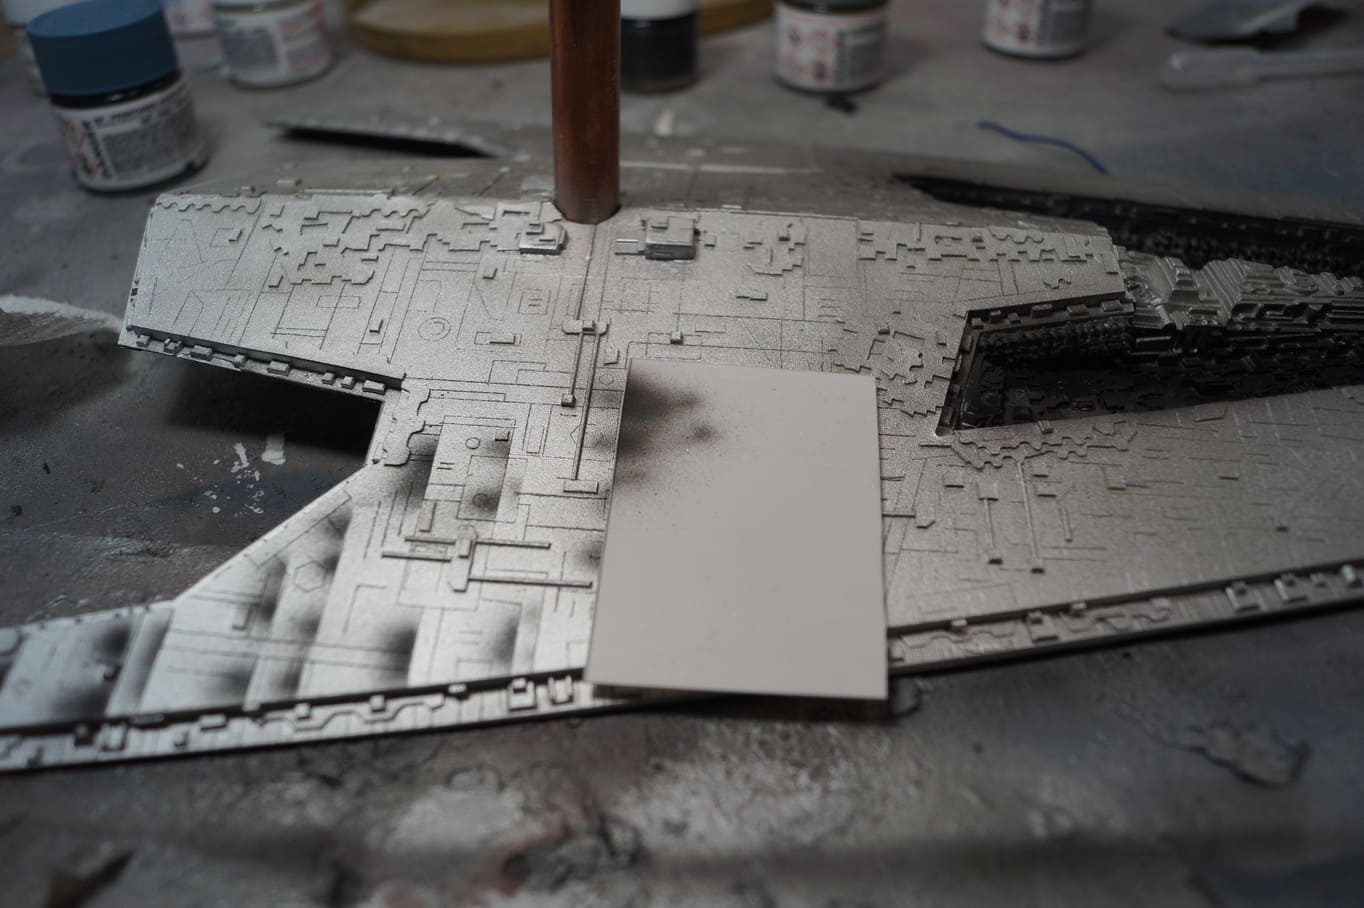
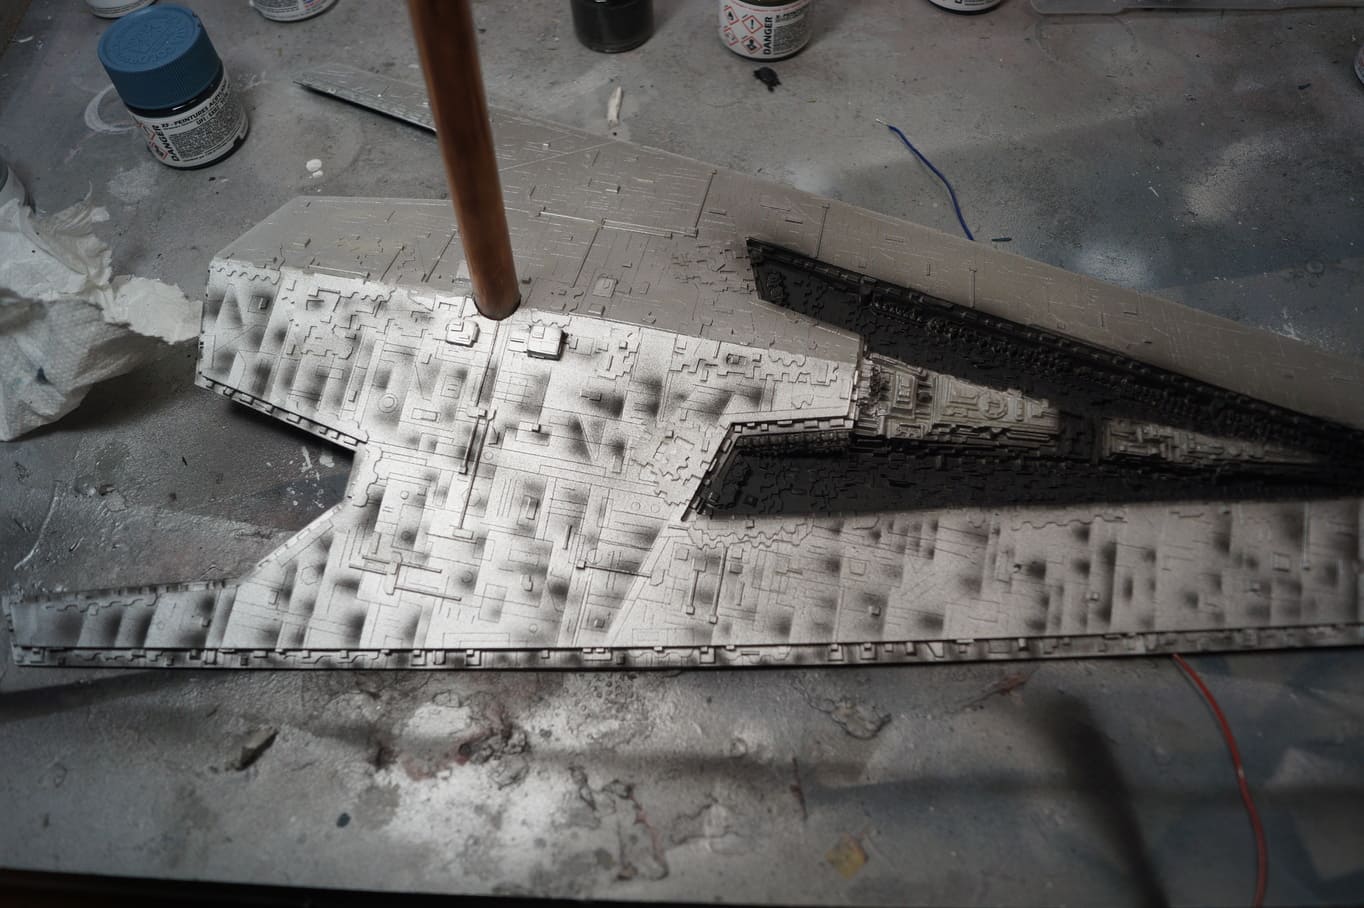
The main color is a Tamiya blending: 80% white XF-1, 10% medium blue FF-18 and 10% skygrey XF-19
The result:
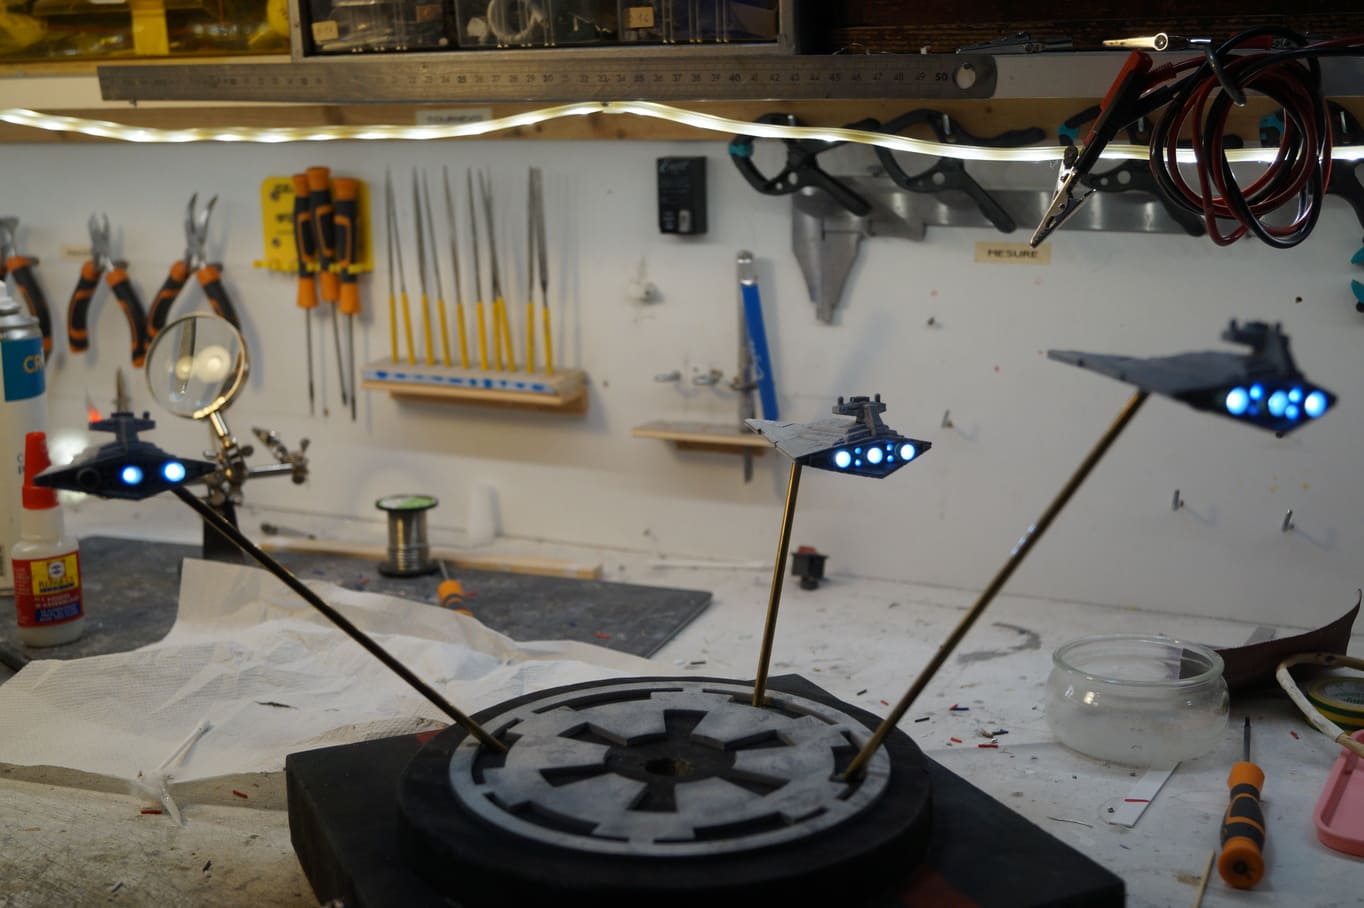
Display stand and Stardestroyers
At last, a pretty model must have a pretty stand. My friend Dmonique Mallerte from Héritiers de la Force cut an imperial emblem with his laser. Thanks to him.
On the stand, 3 imperial stardestroyer (smaller than this one). They are from F-Toys, scaled closely to the Executor (just a little bit too long but that’s ok).

First exhibition for the super stardestroyer Executor.
I showed the model for the very first time during Migennes 2026 but I intend to show it again during Cusset Generations Star Wars 2026 and amnu other conventions like Thonon-les Bains. I hope I’ll see many of you there.