

This page shows you a few useful technics to build a model. It is not a complete tutorial like those you can easily find on the net, the purpose is simply to show quickly what can be done. For more complete tutos, follow the links ‘creation partners‘ on the front page.

The base color is always sprayed with an airbrush to avoid ungraceful handbrush marks.
The color is of course different from a model to another one but for Star Wars vehicles, it is very often the same : a very clear grey made from 7 volumes of flat white Tamiya XF2) mixed with 1 volume of skygrey (XF19)
To perform the paintjob, I apply many successives thins coats until I get an homogeneous tint.

Before perofmring the paintjob itself of a model, you must apply a primer. There are two benefits : by choosing a sticky paint, you can increase the grip of the later layers and by choosing a very covering paint, you homogenize the color before the final one.
The chrome-sivler X-11 tint from Tamiya offers these two benefits, I use it almost every time.

Models transparent parts requires a special processing. In order to keep the transparency, you must abbsolutely avoid the dissolution glues (Tamiya for example) or cyanos. The dissolution glues will… dissolve the parts. The cyano glue vapors alone will be enough to damage the parts and loose the transparency. So what to do ? Joker. When you don’t know which glue to use, use the white one, the wood glue. Gluing plastics with wood glue, this is madness ! Yes but it works. Of course the gluing is not very strong but it will suffices if you are a delicate modeler.

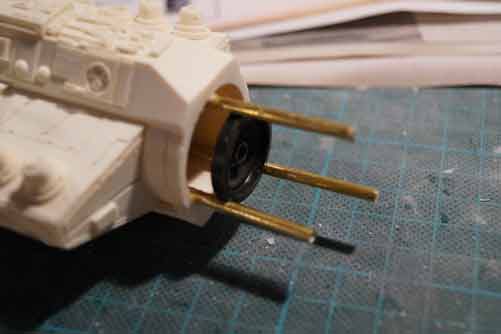
This neologism means the fact of reinforce a model structure when it’s big or includes heavy parts. All you have to do is fitting metalic rods (brass rods, most of the time) to ensure the structure sturdiness. This model parts are threaded into the rods, like a brochette. Ths major complication is to find a glue working with both metal and plastic (or resin). Bi-component epoxide glue works most of the time.