- Length : : 30 cm
- Width : : 35cm
- Height : : 38 cm
- Materials : : Bois, plastique, bicarbonate de sodium
- Scale : : 1/48
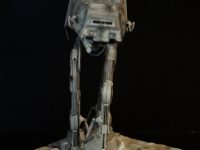
Well we must face reality, I filed this project into the “diorama” category but it is mainly one model : the imperial AT-AT. If you want to highlight an AT-AT using a Star Wars movie scene, there is less choice than for a X-Wing or a Y-Wing : there is the battle of Hoth or the platform on Endor. By the way this one on my mind but that’s another story.
So I chose the battle of Hoth, one of the finest moments of the all saga.
That lefts two possibilities :
- snowspeeder tying up the AT-AT’s legs
- snowspeeder being crushed by an AT-AT
And you must think a lot because the scale won’t be the same. Let me explain…
What is the height of an imperial AT-AT used during the battle of Hoth ?
Differing opinions exist. Since a fee years it is recongnised that an AT-AT is 22,50 m in height (sorry I don’t know how many feet it is, and I don’t want to know, please my US friends, use the metric system, it is so useful !). But for many years, this height was given 15,50 m. Why such a difference ? It depends on the scene we’re watching.
When Wedges Antilles’ snowspeeder T-47 hobbles the legs of the AT-AT, it semmes very tiny but when the same snowspeeder is being crushed, the foot gives aniother idea of the scale, the snowspeeder seems bigger. We can figure out on the screenshots below :
The foot of the AT-AT hardly covers the snowspeeder’s cockpit The snowspeeder seems tinier, the foot of the AT-AT would cover it totally
So it may be acceptable to choose one or another scale depending on what we want to show. I chose the first scene because it fitted better with the Finemolds snowspeeder and the revell AT-AT I had. The scale is 1:48 and the height of the AT-AT is 15,50 m.
Detailing the Revell AT-AT
When I made this model, more than ten years ago, Bandaï hadn’t bought the Star Wars license and Fine Molds hardly produced one kit every two years. I had only two choices to get an AT-AT model :
- the old AMT kit, no scale pointed out, too small and panel lines embossed
- the new Revell kit, brand-new and awful and far far away from the original model in details but big enough to consider a nice detailing work.
Of course I chose the second one but the detailing work promised to be huge. i won’t show averything in this article but at least the three major modifications.
Engraving
I already reviewed this technic in the A-Wing post. First, you have to sand the all surface :

then engrave to get realistic manel-lines :

The technic is explained here.
2. The gribblies : kitbash
What we call “gribblies” are small model parts we use without purpose other than detailing. ILM modelers practically invented the concept. the models used in the Star Wars movies were usually big metallic or wooden structures covered with gribblies got from real model kits.

Here is an example of what we can do with a little bit of patience. The underside of the AT-AT was almost without details on the original kit.
I gathered teh parts from tanks, planes or whatever kits, as long as it “works”.
Hard to say when it “works”, that’s a mater of feeling. Movie screenshots can help but we can not find always the exact same part.
Here is below a picture of the rear. It is interesting because for once, I was able to find the exact part used by ILM, the shield of a WW2 american artillery gun :

At last, a picture fo the hankle of the machine. I had to dig and recreate the cog that alows the hankle to slide.

3. Full scratch
When the global shape is acurate, gribblies detailing is enough. That was the case with the AT-AT’s body but not the head. it was irrestrievable, I had to re-make almost the all thing. Inclufing the neck :


The “ears” of the machine ar well-known lego parts : radar dishes. I only sanded and filled them with putty.
Luke’s T-47 snowspeeder

The snowspeeder was properly assembled “out of the box” and then meticulously destroyed to simulate the crash consequences.
The snow is made from bicarbonate of soda as on the rest of the diorama. By the way, that’s exactly what did the guys from ILM when the shot the scene.
The decor
At last, a little word about the decor. Quite simple , the snow is made from bicarbonate of soda, sold almost everywhere. You must think of stabilize it. The easiest way to do that is to spray a white glue dilution with a random vaporizer. Two or three days of drying and it’s done.
Battle of Hoth exhibitions
Tgis was on my first “serious” diorama. it is ten years old now. i exposed it two times :
by petersteven


